
Ever felt the desire to change your space with a fresh style? Magnetic track lights might be exactly the upgrade you want.
First, plan your layout to install magnetic track lights easily. Gather the necessary tools, like a screwdriver and a drill. Follow the manufacturer's instructions to mount the track. Then, snap the light fixtures into place. Check that connections are secure. This step is very important for good performance.
I remember the first time I chose to put magnetic track lights in my living room. The task seemed huge at first. My plan helped a lot. The tools I had really came in handy. Installing the lights soon became a rewarding task. Snapping those lights into place was incredibly satisfying. The whole room transformed beautifully. Let me share some insights with you. Maybe these tips really help your installation process become smooth and enjoyable.
Magnetic track lights require no tools for installation.False
Installation requires tools like a screwdriver and a drill.
Magnetic track lights offer sleek, modern lighting solutions.True
The context describes them as sleek and modern lighting options.
What Tools Do You Need to Install Magnetic Track Lights?
Let's explore magnetic track lights. Get ready for a successful installation. Proper tools help change your space easily.
You'll need a tape measure, drill, screwdriver, wire stripper and voltage tester to set up magnetic track lights. These tools help measure correctly. They help attach the lights firmly. They help keep electrical connections safe.
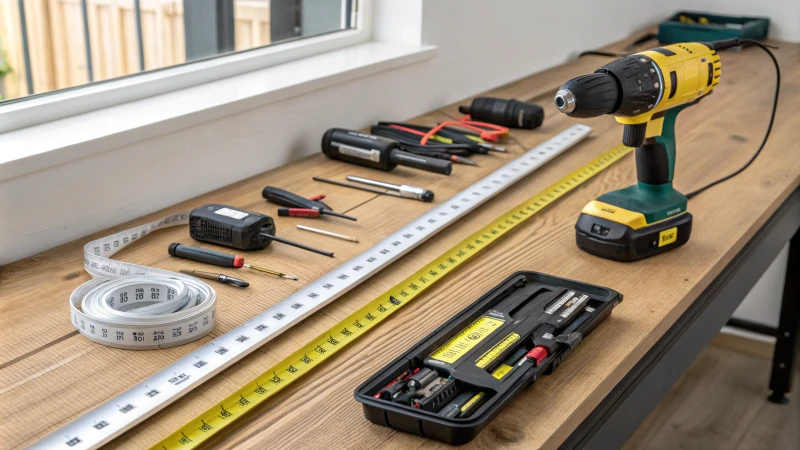
Essential Tools for Installation
Thinking back to the first time with magnetic track lights feels like preparing for a magic show. Success needed the right tools for everything to go smoothly.
Measuring Tools
A tape measure is essential. Proper spacing is crucial. I once relied on guessing the distances and ended up with a chaotic zigzag light show, not a neat line. Measure twice, install once. Trust this advice.
| Tool | Purpose |
|---|---|
| Tape Measure | For accurate spacing |
| Level | To ensure even alignment |
Electrical Tools
For wires, a wire stripper is the tool for speed and safety. The first use made me feel like an electrical hero, skillfully removing insulation. A voltage tester provides peace of mind by confirming that circuits are safe before starting work.
| Tool | Purpose |
|---|---|
| Wire Stripper | For safe and efficient wire handling |
| Voltage Tester | To check circuit safety |
Installation Tools
A reliable drill is vital for attaching tracks to ceilings or walls. The first drilled hole sounded exciting and satisfying. And the dependable screwdriver is important for those final adjustments.
| Tool | Purpose |
|---|---|
| Drill | For creating mounting holes |
| Screwdriver | For fastening and adjustments |
Additional Considerations
- Safety Gear: Safety is key! Gloves and goggles protect against small injuries and essential protection.
- Instruction Manual: Keep the manufacturer’s guide1 nearby for important steps you might miss.
Getting these tools not only helps the installation but also turns it into an exciting project rather than just a task. For more advice on choosing great magnetic lights, explore expert reviews2. Precision and safety are your best helpers in this bright journey!
A voltage tester is needed for magnetic track lights.True
A voltage tester ensures circuits are not live, crucial for safety.
A hammer is essential for installing track lights.False
Installation requires a drill and screwdriver, not a hammer.
How Can You Install Magnetic Track Lights?
Have you ever felt that your room's lighting is no longer good enough? Magnetic track lights could be the perfect solution. You might be able to install them yourself!
Start by planning your layout to install magnetic track lights. Then mount the track to the ceiling. Connect the power supply next. Finally, attach the light fixtures securely onto the track.

Planning Your Layout
Here's a little secret: successful DIY projects start with a plan. I once struggled in a dark room, staring at blueprints while installing my first magnetic track lights. It began with a cup of coffee and a sketch pad. I drew where each light would go. I thought about how they would highlight my favorite art pieces and brighten the room. This step is very important. Consider both the look you want and how you’ll use the space. Gather everything you need: tracks, connectors, fixtures, and power supplies.
Mounting the Track
Mark Drill Points: Use a pencil to mark spots for holes on the ceiling for the mounting brackets. I balanced on a ladder and made sure my lines were straight. Precision matters here!
Drill Holes: Drill holes carefully at marked spots. My heart raced for the first drill, but it’s not so bad once you start.
Install Mounting Brackets: Mount the brackets with screws. Double-check with a level to confirm perfect alignment.
Attach Track: Confidently connect the magnetic track to the brackets. It’s like fitting a puzzle piece.
Connecting the Power Supply
This part might seem hard, but it’s completely doable:
Turn Off Power: Always prioritize safety! Switch off electricity3 at the breaker before starting any electrical work.
Wire the Track: Connect the track to your building’s electrical system with wire connectors. Picture me, maybe a bit nervous, securing every connection snugly.
Test Power Supply: Turn the breaker back on and test everything. The joy when the first light shines is real!
Attaching Light Fixtures
Now comes the fun part:
Position Fixtures: Place each light along the track4 according to your plan.
Secure Fixtures: Snap them firmly into place; they should be stable and look good.
Adjust Angles: Show your creative side - adjust angles to set the perfect vibe.
Additional Considerations
- Safety Precautions: Always follow safety guidelines5 during electrical work; keep protective gear ready.
- Custom Designs: Smart controls add extra functionality; they are like icing on the cake.
Tools & Materials Needed
| Tools | Materials |
|---|---|
| Drill | Magnetic Track |
| Screwdriver | Light Fixtures |
| Level | Connectors |
| Wire Stripper | Mounting Brackets |
| Protective Gear | Power Supply Unit |
and there you have it! With thoughtful planning and some effort, transform any space with magnetic track lights—it’s truly rewarding to see your vision become real.
Magnetic track lights require a power supply unit.True
The installation process includes connecting to a power supply.
You can install magnetic track lights without drilling.False
Drilling is necessary to mount brackets for the track.
How Can You Troubleshoot Common Installation Problems?
I remember the first time I tried to put in a new lighting system. I faced what felt like an endless number of problems. A bit of patience helped me a lot. A smart plan was very useful too. Troubleshooting soon felt much easier.
To fix common installation problems, first, identify the issue by looking at error messages. Next, check the system requirements and compatibility. Use reliable resources for advice. Test solutions carefully to find the cause.

Identifying the Problem
When I started with lighting systems, error messages often confused me. Once, I saw a message about "insufficient disk space." The computer was full of old files. Deleting some files solved the issue. Very simple! Now, when I see an error, I search online quickly. Others have faced the same problems and have shared their fixes. A quick search of the error code online can also provide valuable insights6.
Checking Compatibility
I remember installing a lighting control system and realizing my computer wasn't suitable. It felt very frustrating, like forcing a square peg into a round hole. So now, I always check the manufacturer's compatibility list to prevent such problems. Confirm that your hardware or software meets the system requirements by checking compatibility lists7 from manufacturers.
Updating Drivers and Software
A big realization hit me when an installation failed because of outdated drivers. I now routinely update all drivers and software before starting any installation. Many vendors offer automatic updates8, saving me from extra stress.
Methodical Testing
I discovered that fixing too many problems at once only caused confusion. Now, I test one change at a time. Once, a new light fixture didn't work; replacing it with a known good one quickly identified the problem.
| Step | Action |
|---|---|
| Identify Issue | Review error messages |
| Check System | Verify compatibility and requirements |
| Update Software | Ensure drivers and software are current |
| Test Methodically | Change one variable at a time |
Utilizing Reliable Resources
Forums and user guides are treasures of information. It's comforting knowing I'm not alone; there's a community eager to help on tech forums9. Whether it's tech support or tech forums, I always document my steps during troubleshooting as this helps if more assistance is needed.
Error messages provide clues to installation issues.True
Error messages often indicate the nature of installation problems.
Compatibility issues rarely affect installations.False
Incompatibility is a common issue that can halt installations.
What Are the Benefits of Using Magnetic Track Lighting?
Have you ever thought about lighting changing as easily as your lifestyle does? Magnetic track lighting could really be the solution.
Magnetic track lighting provides exceptional adaptability. Users effortlessly move light fixtures to different positions without tools. This lighting method uses little energy. It improves how spaces look. These systems integrate easily with smart systems. People manage lighting with precision and ease.

Enhanced Versatility and Flexibility
Imagine you have the power to change your room's lighting easily. No tools needed, no permanent fixtures required. Magnetic track lighting offers this convenience. I remember when I first tried it; I could move the lights easily to show off my favorite art. Workspaces and homes that change frequently benefit from this versatility. This lighting system adapts to your needs.
Energy Efficiency
If you want to lower energy bills and help the environment, magnetic track lighting helps. These systems use LED technology, which consumes significantly less electricity compared to conventional lighting. They use less energy and last longer than traditional bulbs. I switched my home office to LED magnetic tracks, and my energy bills dropped. Fewer bulb changes are also a relief.
| Lighting Type | Average Power Consumption | Lifespan (hours) |
|---|---|---|
| Magnetic Track (LED) | 10-15 watts | 25,000+ |
| Traditional Incandescent | 60 watts | 1,200 |
| Halogen | 30-50 watts | 2,000 |
Aesthetic Appeal
I love minimalist designs, and magnetic track lighting matches that style perfectly. The sleek lines and unobtrusive profiles fit modern spaces seamlessly. Whether updating an office or adding style to a store, these lights bring elegance without overwhelming decor. You can choose from many different fixtures to match your style perfectly.
Integration with Smart Systems
In today's world, smart systems are important for homes and workplaces. Remote lighting control is very convenient; I adjust my lights from my phone even when I'm far away. Magnetic track lighting works well with smart systems—lights adjust based on natural light and when people are present—keeping everything efficient and easy.
Explore our smart control solutions10 to see how you can probably improve your lighting systems for better performance and cost savings.
Application in Various Settings
Whether you're a homeowner wanting versatile living spaces or managing a business needing product display, magnetic track lighting supports you effectively. In stores, it highlights products beautifully; in offices, it offers focused task lighting; at home, it lets you change mood and ambiance effortlessly.
Discover more in our lighting solutions11 for more ideas on how these systems can transform your space.
Magnetic track lighting requires tools for repositioning.False
Magnetic track lighting allows easy repositioning of fixtures without tools.
LED technology in magnetic tracks reduces energy bills.True
LED lights consume less electricity and have a longer lifespan, lowering costs.
Conclusion
Learn how to easily install magnetic track lights with essential tools, planning, and safety tips. Transform your space with energy-efficient, stylish lighting solutions that adapt to your needs.
Access detailed installation manuals that guide you step-by-step through the process. ↩
Explore expert reviews to find top-rated magnetic track lights for your project. ↩
Discover detailed instructions for safely connecting your magnetic track light system to a power source. ↩
Explore optimal placement strategies to enhance lighting efficiency and design aesthetics. ↩
Learn important safety tips to prevent accidents during lighting installations. ↩
Discover what various error codes mean to address installation issues effectively. ↩
Ensures your system is compatible with the software you're installing, preventing issues. ↩
Automate updates to keep your drivers current, minimizing installation problems. ↩
Engage with a community that offers proven solutions to common installation challenges. ↩
Learn how integrating smart controls can optimize your lighting system's efficiency and functionality. ↩
Explore diverse applications of magnetic track lighting in retail and home environments for effective illumination. ↩