


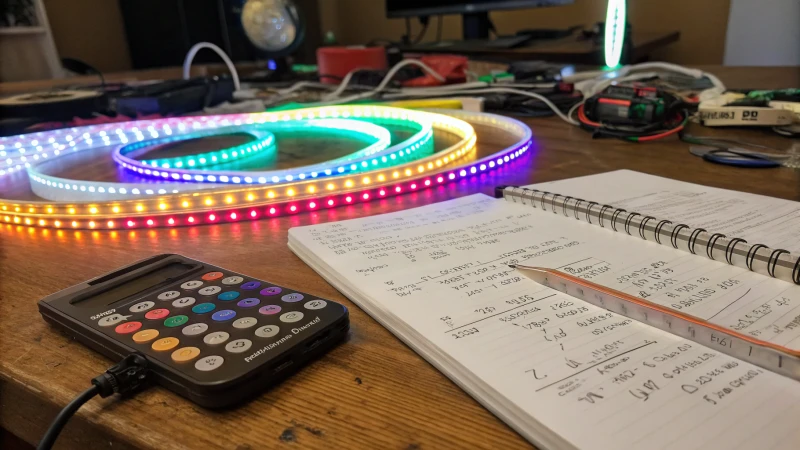
Ever tried to connect multiple LED strips to one power source, only to feel a bit lost?
To connect multiple LED strips to one power source, calculate the total wattage, use power distribution blocks for even power distribution, and ensure voltage drop is minimized with thicker gauge wires and power injection for longer runs. Always wire in parallel and select a power supply rated for the combined load to ensure stable operation and prevent overheating.
I remember the first time I attempted this task. It was like trying to solve a puzzle with missing pieces. Understanding voltage drop, selecting the right wire gauge, and ensuring proper power distribution felt daunting. But once I grasped these concepts, the process became much clearer. In the sections ahead, I’ll share insights and tips that transformed my own DIY lighting project into a success. Let's dive deeper into each step to ensure your setup not only works efficiently but also shines as brightly as you've imagined.
LED strips must be connected in series for uniform lighting.False
LED strips should be connected in parallel, not series, to ensure uniform lighting.
Voltage drop can affect LED strip brightness over distance.True
Voltage drop causes reduced brightness; address it by using thicker wires.
Why Choose Parallel Connections for Your LED Strips?
Imagine never worrying about uneven lighting in your favorite spaces again.
Using parallel connections for LED strips ensures each strip shines consistently bright by delivering full voltage, avoiding the dimming issues common in series setups. This method is perfect for maintaining reliable, vibrant lighting across all your strips.

Understanding Parallel Connections for LED Strips
I remember the first time I tackled an LED strip project; the excitement of lighting up my living room was palpable. But, like many beginners, I quickly ran into problems with dimming lights. That's when I discovered the beauty of parallel connections. With each strip receiving full voltage, even if one strip goes kaput, the rest stay as bright as ever.
Consistent Brightness Across Strips
There's something incredibly satisfying about having every inch of your space uniformly lit. When you connect LED strips in parallel, each strip gets to bask in the glory of direct power. Picture this: no more arguing with your partner about why one end of the kitchen looks like a candlelit dinner while the other is floodlit.
| Feature | Parallel Connection | Series Connection |
|---|---|---|
| Voltage Supply | Full voltage to each strip | Divided voltage across strips |
| Brightness Consistency | High | Can vary |
| Fault Tolerance | Single failure does not affect others | One failure can disrupt entire circuit |
Simplified Troubleshooting and Maintenance
I can't tell you how many times I've sighed in relief knowing that a single malfunctioning strip doesn't mean hours of detective work. With parallel wiring, it's just a matter of swapping out the faulty strip without affecting the whole setup—saving both my sanity and maintenance costs1.
Voltage Drop Mitigation
For those of us who love a grand lighting display, long runs of LED strips are a dream come true—but voltage drop can be a nightmare. Parallel connections help keep every strip glowing strong. And for those extra-long runs? Injecting power at various points keeps everything brilliantly lit and hassle-free2.
Power Supply Considerations
I learned early on to double-check my power supply calculations—a lesson hard-won from a project that ended in flickering disaster. Ensuring your power source can handle the total wattage is crucial. It’s a bit like making sure you've got enough outlets before hosting a party—you don't want to leave your guests (or your LED strips) in the dark.
Delving deeper into these technical aspects can really make a difference in achieving an efficient and reliable lighting system. Trust me, once you get the hang of it, you'll wonder why you ever settled for anything less than parallel perfection3.
Parallel connections provide full voltage to each LED strip.True
In parallel connections, each strip receives the full voltage, ensuring optimal performance.
Series connections ensure consistent brightness in LED strips.False
Series connections divide voltage among strips, leading to potential brightness inconsistencies.
How Do You Calculate the Total Wattage for Your LED Setup?
Ever found yourself tangled in a mess of wires, LED strips in hand, wondering if you’re about to short-circuit your dreams? Trust me, I’ve been there.
To calculate total wattage, multiply the wattage per meter of your LED strip by its length. Ensure your power supply supports at least 1.2x the total wattage to handle potential losses.
Understanding Wattage Requirements
Before we dive into any calculations, it's essential to know your LED strip's wattage per meter4. This information is typically provided by manufacturers and varies based on strip specifications. Knowing this number is crucial because it can save you from a lot of headaches down the line.
Calculating Total Wattage
I once decided to jazz up my living room with some LED strips, and let me tell you, the math wasn’t as daunting as I thought. Here's a simple formula to determine your LED setup's total wattage:
Total Wattage = Wattage per Meter x Total Length (meters)For example, if you have an LED strip that's 10W/m and you’re planning to install 5 meters of it, you’re looking at a total wattage of 50W. It’s like ordering coffee; once you get the hang of it, you’ll be calculating with confidence.
Choosing the Right Power Supply
Here’s where it gets interesting. Once you've calculated the total wattage, select a power supply that can handle at least 1.2 times your total wattage—think of it like grabbing an umbrella for a sunny day, just in case it rains. This buffer accounts for potential losses5 and ensures longevity and stability.
| Total Wattage | Recommended Power Supply Capacity |
|---|---|
| 50W | 60W - 75W |
| 100W | 120W - 150W |
| 200W | 240W - 300W |
Consider Voltage Drop
Ah, the dreaded voltage drop! It can dim your dreams if your LED run is too long. To mitigate this issue, use thicker gauge wires and consider power injection at multiple points. If you're running over 10 meters, voltage drop might cause dimming. Using a power distribution block6 can help distribute power evenly across all strips.
Wiring and Gauge Considerations
Speaking of wires, their gauge can make or break your setup’s stability. For anything over 5 meters, go with a thicker gauge wire (14-16 AWG) to minimize power loss. This helps maintain consistent voltage throughout the setup—it’s like ensuring your Wi-Fi reaches every corner of your home.
Parallel Connections Over Series
Here's a pro tip: always connect LED strips in parallel rather than series. This ensures each strip receives full voltage and prevents uneven lighting due to one strip drawing excessive current—a parallel connection7 maintains brightness and functionality across all strips. Think of it like sharing snacks evenly among friends; everyone gets their fair share, keeping brightness intact across all strips. Remember to avoid daisy-chaining multiple strips in a single line as it might affect performance.
LED strips should be connected in series.False
LED strips should be connected in parallel to ensure full voltage.
Use thicker wires for LED runs over 5 meters.True
Thicker wires minimize power loss and maintain consistent voltage.
Why Is Voltage Drop Important in Long LED Strip Runs?
Ever tried setting up a long LED strip only to find the light dimming halfway through? Voltage drop might be the culprit!
Voltage drop in long LED strip runs leads to reduced brightness and color inconsistency. Managing it requires appropriate wire gauge, parallel connections, and strategic power injections to maintain uniform lighting.

Understanding Voltage Drop
Remember the time I decided to light up my entire living room with those gorgeous LED strips? I thought it would be a breeze, but then I hit a snag—halfway through the installation, the lights at the far end were noticeably dimmer. That's when I learned about voltage drop. Voltage drop happens when the current flows through a wire, causing a decrease in voltage along its length. This is crucial for long LED strip runs because without addressing it, you might end up with lights that look more like a fading sunset than a vibrant display.
Why It Matters
-
Brightness and Color Consistency: Picture this—you're showcasing your latest project to a client, and the lighting is supposed to be the pièce de résistance. But then, oh no, one end is glowing bright while the other looks like it's in perpetual twilight. This difference can be a deal-breaker, affecting both aesthetics and client satisfaction8.
-
Efficiency: Ever notice how your energy bill spikes when things aren’t running efficiently? A significant voltage drop means your power supply works overtime to make up for the loss, jacking up energy consumption and reducing overall system efficiency.
Calculating Voltage Drop
To avoid such mishaps, here's how you calculate it:
[
Voltage\ Drop\ (V) = \frac{2 \times Length \times Current}{Conductor\ Area}
]
This formula accounts for the run's length, current, and conductor's cross-sectional area. Trust me; it's worth using a reliable voltage drop calculator9 for accurate results.
Mitigating Strategies
-
Use Thicker Wires: Once upon a time, I skimped on wire thickness thinking it wouldn’t matter much—big mistake! Thicker wires mean less resistance and less voltage drop. For runs longer than 5 meters, aim for 14-16 AWG wires.
-
Power Injection: Imagine trying to water a garden with a hose that barely reaches the plants at the end. Injecting power at multiple points along the strip ensures all parts get enough "juice" to shine bright, especially for strips over 10 meters.
-
Parallel Connections: Remember when I tried connecting my strips in series? Let's just say it didn't end well. Always go for parallel connections—this way, each section gets full voltage from the source, preventing any single section from hogging all the current.
Example Setup
| Distance | Recommended Wire Gauge | Power Injection Points |
|---|---|---|
| Up to 5m | 18 AWG | None |
| 5m-10m | 16 AWG | Mid-point |
| 10m+ | 14 AWG | Multiple |
For anyone diving into LED installations, I'd highly recommend checking out an installation guide10. It breaks down these concepts with visuals that make the whole process feel like a DIY project instead of a daunting task.
By understanding and addressing voltage drop effectively, you're not just ensuring your LED strips look fantastic—you're also making sure they perform efficiently and consistently across their entire length.
Voltage drop affects LED strip brightness.True
Voltage drop reduces brightness in long LED strips due to decreased voltage.
Using thinner wires reduces voltage drop.False
Thicker wires reduce resistance and thus minimize voltage drop.
What Tools and Materials Are Essential for Connecting LED Strips?
Ever tried to set up LED strips and felt overwhelmed by the tools you need? You're not alone! Here's a breakdown of the essentials for a hassle-free installation.
To connect LED strips effectively, you need an LED strip light, a compatible power supply, connectors, soldering tools, and suitable wire gauges. Also, consider using power distribution blocks for efficient energy management.

Key Tools for LED Strip Installation
When I first decided to light up my home office with LED strips11, I quickly learned the importance of having the right tools. It reminded me of the time I tried assembling a bookshelf without a screwdriver—let's just say it didn't go well. A basic toolkit for LED strips should include:
-
Soldering Iron and Solder: These are like your magic wand for connecting LED strips to power supplies or linking them together.
-
Wire Strippers: Picture these as the scissors for your wires, essential for getting those clean connections.
-
Multimeter: This little gadget saves the day by checking voltage levels and troubleshooting issues.
Important Materials
I remember standing in the aisle of my local hardware store, staring at the endless options for LED strips. Choosing the right materials is half the battle:
-
LED Strips: Consider brightness, color, and flexibility—think of it as picking the perfect outfit for your room.
-
Power Supply: It's crucial that this matches your LED strips' voltage and wattage needs.
Power Supply Ideal Use Case 12V Short runs (<5 meters) 24V Longer runs (>5 meters) -
Connectors: These make linking multiple strips as easy as pie—no soldering required.
Considerations for Voltage and Wiring
Dealing with voltage drop felt like solving a mystery the first time around. Here's how to keep everything bright:
-
Use thicker gauge wires, like 14-16 AWG, for longer distances.
-
Power injection points along the strip maintain brightness.
-
Connect strips in parallel rather than series to ensure even voltage distribution.
Utilizing Power Distribution Blocks
Power distribution blocks became my best friend during complex installations:
-
They allow multiple LED strips to share a single power source efficiently.
-
Ensure even current distribution, preventing overheating and voltage drop issues.
Explore more about power distribution techniques12 to optimize your setup.
Additional Tips for Successful Installation
It was a lightbulb moment when I realized how crucial it was to calculate total wattage:
-
Always calculate total wattage needed for your setup to avoid overloading your power supply.
-
Use quality distribution blocks and connectors to ensure stability and safety throughout the system.
Understanding these essentials can significantly enhance your LED lighting project13. By being well-prepared with the right tools and materials, you can achieve a professional-grade installation that meets your aesthetic and functional needs.
A multimeter is essential for LED strip installation.True
A multimeter checks voltage levels, crucial for troubleshooting.
Connectors are unnecessary if you have a soldering iron.False
Connectors simplify linking strips without soldering, enhancing ease.
Conclusion
Learn how to connect multiple LED strips to a single power source safely, ensuring consistent brightness through parallel connections, proper wattage calculations, and voltage drop management.
-
Learn why parallel connections simplify maintenance by isolating faulty strips, reducing downtime and costs. ↩
-
Explore methods to stabilize power distribution and prevent voltage drops in long LED strip installations. ↩
-
Understand how to calculate power supply needs to ensure optimal performance for your LED lighting setup. ↩
-
Understanding typical wattage per meter helps ensure you choose the right LED strips for your needs. ↩
-
Accounting for potential losses ensures you choose a power supply that can handle unexpected power demands. ↩
-
Power distribution blocks help in maintaining stable voltage across multiple LED strips, enhancing performance. ↩
-
Setting up parallel connections optimizes LED strip performance by ensuring even voltage distribution. ↩
-
Explore how brightness and color consistency affect project aesthetics and client satisfaction. ↩
-
Find a reliable tool to accurately calculate voltage drop for your specific setup. ↩
-
Discover practical guides with visual aids for effective LED strip installations. ↩
-
Gain insights into the step-by-step process of installing LED strip lights, ideal for beginners. ↩
-
Learn about different types of power distribution blocks to effectively manage LED installations. ↩
-
Explore case studies of successful LED installations to inspire your own lighting projects. ↩


