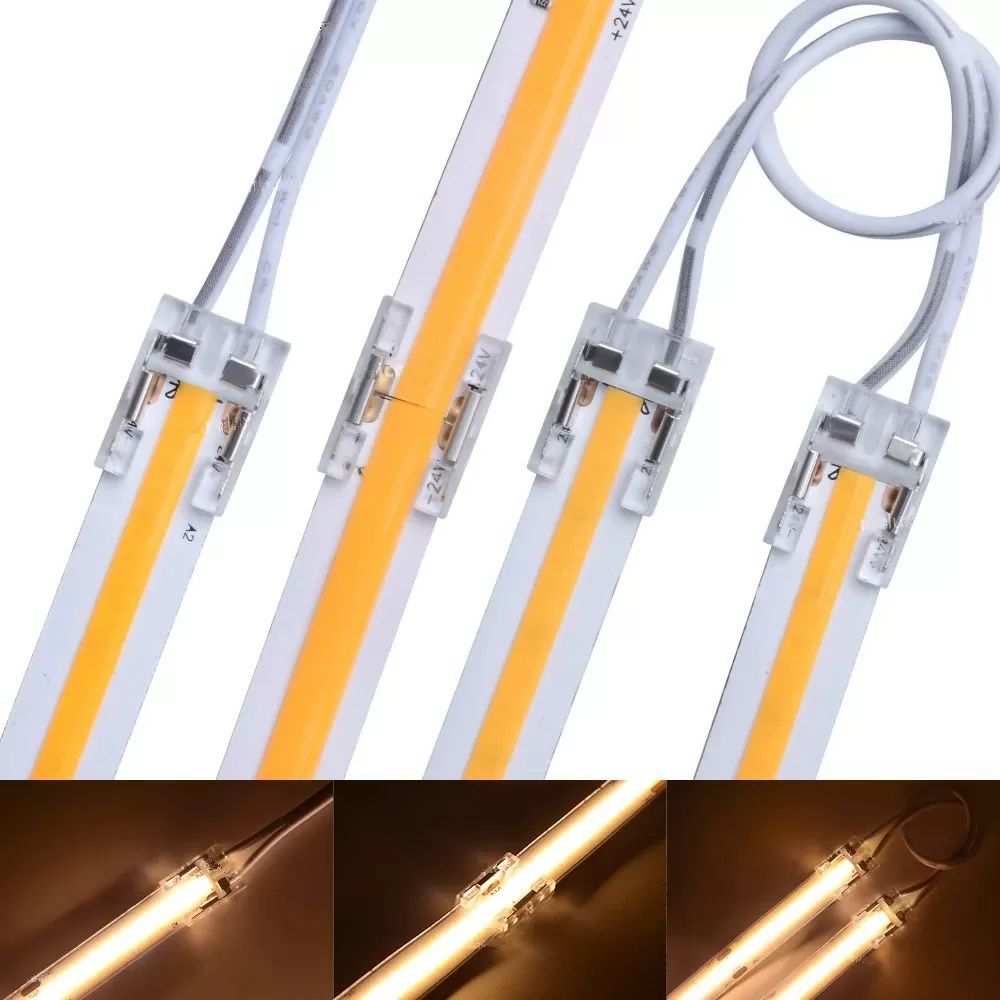
An LED strip light is a type of lighting made up of a series of small light-emitting diodes (LEDs) mounted on a flexible circuit board strip. These lights are typically used for accent lighting or to add a decorative touch to a space. They can be cut to size and easy to install, helping them make a suitable choice for a wide range of lighting applications.
LED strip lights run a current through a series of small, light-emitting diodes (LEDs) mounted on the flexible circuit board. When the current passes through the LEDs, they emit light. It can control the brightness and color of the light produced by the LEDs by adjusting the present and the type of LEDs used in the strip
Besen is company manufacturing led strip lights
Anatomy of an LED strip
The anatomy of an LED strip light typically includes the following components:
- Flexible circuit board: This is the base of the strip light, providing the physical support and electrical connections for the LED chips. The circuit board is typically made of a flexible, heat-resistant material that allows it to be bent and shaped into different forms.
- LED chips: These are the small, low-power light-emitting diodes that are mounted on the circuit board. Each chip emits a small amount of light, and when many of these chips are mounted on a strip and powered together, they can produce a significant amount of light.
- Protective coating: The LED chips and circuit board are typically covered by a protective layer that helps to protect them from damage and the elements. The coating is generally made of an explicit, flexible material that does not affect the light output of the LEDs.
- Adhesive backing: Many LED strips have an adhesive backing that allows them to be easily mounted to various surfaces. This makes installation quick and easy, and it will enable the strip to be placed in a variety of locations.
- Power connectors: LED strip lights typically have power connectors on the ends, allowing them to be easily connected to a power source. These connectors can vary depending on the type of strip light, but they are typically soldered onto the end of the strip or attached using a plug-and-play connector.
Overall, the anatomy of an LED strip light is designed to be simple and versatile, allowing it to be used in a wide range of lighting applications.
Determining LED Strip Brightness
The brightness of an LED strip light is determined by the number and type of LED chips mounted on the strip and the amount of current supplied to the strip. LED strip lights are generally available in various brightness levels, from low-output accent lighting to high-output task lighting.
To determine the brightness of an LED strip light, you can look at the specifications provided by the manufacturer. The specifications should include the type and number of LED chips on the strip, as well as the maximum current and power consumption of the strip. You can also look for the strip’s luminous flux, which measures the total amount of visible light that the strip produces.
Additionally, you can compare the brightness of different LED strip lights by looking at their color temperature and color rendering index (CRI). The color temperature of a light is a measure of its warmth or coolness, with lower temperatures appearing warmer and higher temperatures appearing cooler. The CRI measures a light source’s ability to render colors accurately, with a higher CRI indicating better color rendering. In general, LED strip lights with a high CRI and a warm color temperature will appear brighter and more pleasant to the eye.
LED Density & Power Draw
The density of an LED strip light refers to the number of LED chips per unit of length. A higher density of LED chips on the strip will result in a higher overall brightness, while a lower density will result in a lower overall brightness. The density of an LED strip light is typically measured in units of LED chips per meter (LEDs/m).
The power draw of an LED strip light is the amount of power it consumes when operating. This is typically measured in watts per meter (W/m) or milliwatts per LED chip (mW/LED). The power draw of an LED strip light can affect its overall brightness and energy efficiency, as well as the size of the power supply that is required to operate the strip.
In general, LED strip lights with a higher density of LED chips will have a higher power draw and be brighter. To determine the power draw of an LED strip light, you can look at the specifications provided by the manufacturer or use a power meter to measure the power consumption.
LED Strip Color Options: White
LED strip lights with a wide range of colors, including white. White LED strip lights can be further divided into sub-categories based on their color temperature and color rendering index (CRI).
The color temperature of a white LED strip light refers to the warmth or coolness of the white light that it produces. White LED strip lights are typically available in various color temperatures, from warm white (around 2,700-3,000K) to cool white (around 5,000-6,500K). Warm white LED strip lights have a yellowish or reddish hue, while cool white LED strip lights have a bluish hue.
The color rendering index (CRI) of a white LED strip light is a measure of its ability to render colors accurately. LED strip lights with a high CRI (above 80) can produce colors that are more vibrant and true to life than those produced by LED strip lights with a low CRI.
A white LED strip light’s color temperature and CRI can affect its overall brightness and appearance. Warm white LED strip lights may appear softer and more inviting, while cool white LED strip lights may appear brighter and more clinical. Choosing the right color temperature and CRI for a white LED strip light will depend on the specific application and personal preference.
LED Strip Color Options: Fixed and Variable Color
LED strips are a popular and versatile lighting option and come in various colors. There are two main types of LED strip colors: fixed and variable. Fixed LED strips have a set color that cannot be changed, while variable LED strips can display various colors.
Variable color LED strips are often used in decorative and accent lighting applications. it can use them to create dynamic and colorful lighting effects, such as fading, flashing, and color-changing patterns. These strips are commonly used in bars, clubs, and other entertainment venues, as well as in residential and commercial settings for mood lighting and decorative purposes.
Strip light Input Voltage & Power Supply
A strip light’s input voltage and power supply refer to the amount of electrical power required to operate. This is typically measured in voltage (V) and amperages (A), and the exact values will depend on the specific strip light. For example, a 12V LED strip light will require a power supply that can provide at least 12V electrical power.
When choosing a power supply for your strip light, there are a few key factors to consider. First, you must ensure that the power supply is compatible with the strip light and can provide the correct voltage and amperage. It’s also important to choose a power supply rated for the strip light’s total wattage, as this will ensure that it can provide enough power to operate the light properly. Additionally, you should consider the size and design of the power supply, as well as any special features or protections it may offer. For example, some power supplies have built-in overcurrent and short circuit protection to help prevent damage to the strip light and power supply.
How to Connect LED Strips
To connect LED strips, you’ll need to ensure you have all the necessary equipment. You’ll need the LED strips, a power supply, a connection cable, and a controller if you want to be able to control the lights.
- Start by deciding where you want to install the LED strips. Clean the surface thoroughly to ensure that the strips will stick properly.
- Once the surface is clean, carefully remove the backing from the LED strips and apply them to the surface.
- Next, connect the power supply to the LED strips using the connection cable. Make sure that the polarity is correct.
- If you’re using a controller, connect it to the LED strips using the connection cable as well. This will allow you to control the lights using the controller.
- Once everything is connected, turn on the power supply to test the LED strips. If everything is working properly, you should see the lights turn on.
- If you have any issues, double-check your connections to ensure that everything is secure and properly connected. If you’re still having problems, you may need to consult the manufacturer’s instructions or contact customer support.
Aluminum Channels & Heatsinking with strip
To use aluminum channels and heatsinking with LED strips, ensure you have the correct channels for your LED strips. The channels should be the same length as the strips and have the proper width and depth to accommodate the strips.
Next, attach the channels to your desired surface using screws or adhesive tape. Ensure the channels are securely attached and will not move or shift during use.
Once the channels are in place, carefully slide the LED strips into the channels, ensuring that the strips are securely seated. If the channels have covers, snap the covers into place to protect the strips.
Connect the LED strips to a power source and controller (if applicable). Turn on the power and test the lights to ensure they work properly.
If it will use the LED strips at full brightness for extended periods, it’s important to use channels with adequate heatsinking to prevent the strips from overheating and damaging the LEDs. Heatsinking refers to dissipating heat away from the LED strips, typically using a heat sink made of aluminum or other heat-conductive material. Some aluminum channels have built-in heatsinks, while others may require using separate heat sinks attached to the channels.
Once you have installed the LED strips and heatsinking, you can adjust the brightness and color of the lights using the controller (if applicable). With the right installation and setup, aluminum channels and heatsinking can help improve your LED strips’ performance and lifespan.
aluminum track
Dimming and Color Control strip
There are several ways to dim and control the color of LED strips, depending on the type of strips you have and the controller you’re using. Here are a few common methods:
- If your LED strips are connected to a controller with a built-in dimming and color control function, you can use the controller to adjust the brightness and color of the lights. This is typically done using a remote control or a smartphone app, depending on your specific controller.
- Some LED strips are equipped with a built-in dimming function that allows you to adjust the brightness of the lights using a remote control or a smartphone app. In this case, you can use the remote or app to adjust the brightness of the lights as desired.
- If your LED strips are connected to a smart home system, such as Amazon Alexa or Google Home, you can use voice commands to control the brightness and color of the lights. For example, you can say, “Alexa, dim the kitchen lights,” or “Hey, Google, change the living room lights to blue.”
- If your LED strips do not have a built-in dimming or color control function, you can use a separate dimmer or controller to adjust the brightness and color of the lights. These devices typically connect to the LED strips using a connection cable, allowing you to adjust the brightness and color using a remote control or a smartphone app.
To get the best results when dimming and controlling the color of your LED strips, it’s important to choose the right method and equipment for your specific situation. Consult the manufacturer’s instructions and consider the features and capabilities of your LED strips and controller to determine the best way to dim and control the color of your lights.
Determining LED Strip Quality
There are several factors to consider when determining the quality of LED strips, including the type and brightness of the LEDs, the quality of the materials used, the design and construction of the strip, and the warranty and customer support provided by the manufacturer.
- The type and brightness of the LEDs are important factors to consider when determining the quality of LED strips. Higher-quality strips typically use high-quality, high-brightness LEDs that provide consistent and reliable performance. Lower-quality strips may use lower-quality, lower-brightness LEDs that are less durable and may not last as long.
- The materials of the LED strip are also important. Higher-quality strips typically use materials that are durable, heat-resistant, and moisture-resistant. In contrast, lower-quality strips may use cheaper, lower-quality materials more susceptible to damage and failure.
- The design and construction of the LED strip can also affect its quality. Higher-quality strips are typically well-designed and carefully constructed, with sturdy connections and protective coating to prevent damage and ensure long-term performance. Lower-quality strips may have weaker connections and less protective coating, which can lead to premature failure.
- The warranty and customer support provided by the manufacturer are also important factors to consider when determining the quality of LED strips. Higher-quality manufacturers typically offer longer warranties and better customer support, which can make it easier to get help if you have any issues with your LED strips.
LED Strip Lights Manufacturing Process
Step 1: LED Reel Production
The first step in producing LED strip lights is to create the LED reel. This is done by winding the LED strips onto a reel and then connecting the LEDs with the solder. The LED strips are then tested to ensure they are working properly.
At Besen, we use a complex device to fix the LED wafers on a spool. We arranged the wafers in the correct order, ready to be pasted in the next step of the process. The wafers are held in place with wire bonds. We use industrial gold with a purity of 99.99% to ensure a durable connection.
Quality testing.
After producing the reels, placing them in vacuum bags, we bake them to dehumidify them. We also perform photo-color matching to maintain light consistency. Each reel also undergoes a manual microscopic inspection to ensure proper wafer placement.
Step 2:Creating solder molds and applying solder paste on the PCB
After the LED reel is created, the next step is to create the solder molds. This is done by creating a stencil of the PCB layout and then applying solder paste. The solder paste is then heated to melt the solder and create connections between the LEDs and the PCB.
Step 3:Component Placement
Once the solder paste is applied, the components can be placed onto the PCB by SMT machine. This includes the resistors, capacitors, and other components needed to complete the circuit. The components are then soldered onto the PCB to create the connections.
We use high-tech Famous Brand SMT machines that help us maintain high standards and quality.
Step 4: Reflow Soldering
This is done by heating the PCB to a specific temperature to melt the solder and create connections between the components and the PCB. This ensures that the connections are secure and will not loose over time.
Quality testing.
During the reflow process, it’s time to test our LED strips. We test each strip to ensure that the brightness, color, and other specifications of the LED strips are just as designed.
Step 5: The Welding Process
This is done by connecting the LED strips to the PCB using a welding machine. The welding machine is used to heat the connections between the LED strips and the PCB to create a secure and reliable connection.
Quality testing.
After soldering the LED strips, we did a series of tests to ensure the strips worked as promised. Lighting tests confirmed that the strips did not have any loose circuits. it also performed other optical and electrical tests to ensure that the LED strips met our standards and your requirements.
Step 6: Aging and Waterproofing
The LED strip lights are then aged 24 hours and tested to ensure they are working properly. The LED strips are then waterproofed to protect them from moisture and other elements. This process requires covering the LED strips with silicone, plastic.
At Besen, machine and manual inspection are used to ensure that the LED strips are covered evenly. Besen 5050, 5730, 3528, and 3014 LED strip, they are all waterproof available, which allows you to decorate your residence without any worries.
Step 7: Tape Pasting and Packaging
Once the LED strip lights have been tested and waterproofed, they are taped up and packaged to be shipped to the customer. This ensures that the LED strip lights are protected during storage and shipping.
Quality testing.
Surface inspection of each LED strip to ensure its quality and performance.
Check Besen workshop for strip light learn about produce process
Conclusion
Learning about LED strips can help you save money, also allow you purchase the right products the first time around. By understanding the different types of LED strips and their features, you can avoid buying products that are not suitable for your project, which can save time, expense of returning or exchanging those products.


